![[筆記] 從零接觸 Google Map API 2:在 Vue.js 中使用 Geocoding 將地址轉換成地標](https://blog.happycoding.today/wp-content/uploads/2026/03/gather_town_proximity_interaction_1772966072958-1.png)

為了準備 Bootcamp 畢業前的 Final Project — 製作類似訂餐平台 — 開始接觸和學習 Google Map API,上一篇筆記是從零開始學習,並在 Vue.js 中嘗試使用,透過 Maps JavaScript API 服務實作地圖、地標、訊息視窗功能 — 最終將不同行政區的數間假餐廳展示在地圖上,提升使用者體驗 — 本篇將筆記使用 Maps JavaScript API 的另一項功能「Geocoding Service」
認識 Geocoding
Geocoding 服務能協助將地址轉換成經緯度座標;相反的,若想將座標轉換成地址,則可以使用 Reverse Geocoding 服務。
專案預期功能
- 餐廳業主可以在表單輸入餐廳名稱與地址
- 透過 Geocoding 服務將餐廳地址轉換成經緯度座標
- 最終運用上一篇建好的「GMap 元件」將餐廳顯示在地圖上
初始化專案
由於是使用 Maps JavaScript API,專案的建立與初始化與上一篇筆記大同小異,大致流程如下,詳細的內容可以參考上一篇。前期唯一的差異在於本篇使用的 CSS Framework 為 Materialize CSS 而非 Bootstrap,設定會有些差異:
- 前往 Google Map Platform 建立新專案:勾選 Maps 服務
- 取得專案 API Key:在 index.html 載入 Maps JavaScript API 時放入使用
- 在 index.html 中載入 Materialize CSS CDN
熟悉 Geocoding 服務操作
在正式開始實作以前,先熟悉一下如何使用 Geocoding 的功能,更詳細的內容也可以參考 ? 官方文件:
使用 Geocoding 服務
在 js 檔案中,透過 google.maps.Geocoder() 物件建構子建立一個geocoder 物件實例,之後就能透過 geocoder 使用 Geocoding 的功能:
https://pse.is/3esl8q
準備要轉換的地址與設定
將要轉換的地址與相關設定放在一個名為 GeocoderRequest 的物件當中 — 需要注意的是,由於 Google Maps API 根據 address 所搜尋到的地點可能不只一個結果,因此能透過其他三個屬性限制或影響搜尋結果:
- componentRestrictions 屬性:限制搜尋的結果「必須」要符合否些條件,例如搜尋結果必須是特定國家和特定郵遞區號
- bounds /regoin 屬性:影響搜尋結果「傾向」以設定的範圍或地區為優先
// GeocoderRequest 物件
{
 address: string,
 bounds: LatLngBounds,
 componentRestrictions: GeocoderComponentRestrictions,
 region: string
}
將地址轉為座標
使用geocoder 物件實例上的 geocode() 方法請 Google Maps API 協助將地址轉換成經緯度座標 — 需要提供 (1) GeocoderRequest 物件(2) 一個讓 Google Maps API 在取得結果後執行的 Callback 函式:
geocoder.geocode(GeocoderRequest, callback 函式)
處理回傳結果
Google Maps API 在取得轉換的結果後,將執行 Callback 函式,並帶入以下兩個參數 — 根據 status 能判定轉換是否成功,若成功則可以運用 results 資料;若失敗則依據 status 告知使用者相對應的錯誤訊息:
截至目前為止的程式碼
// 建立 geocoder 物件實例
const geocoder = new google.maps.Geocoder();

// 請 Google Maps API 依據地址轉換成經緯度
geocoder.geocode( { 'address': address}, function(results, status) {
  if (status == 'OK') {
    // 若轉換成功...
  } else {
    // 若轉換失敗...
    console.log(status)
  }
});
實作專案
認識完 Geocoding 的使用方式後,接著就開始在 Vue.js 當中使用了
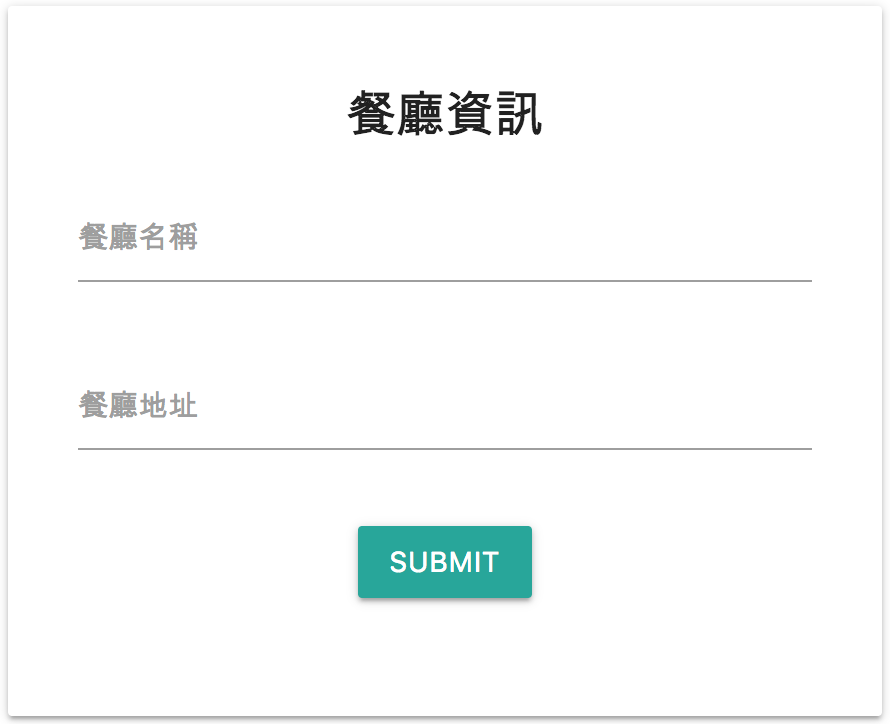
1. 實作表單
首先要建立的是一張表單,讓店家主可以輸入餐廳名稱與地址
- 在 views 資料夾中建立一個名為 NewRestaurant.vue 的新檔案
- 在 <template> 中建立一張表單:設置名稱與地址欄位和送出按鈕
- 建立 geocode()方法:將會處理地址轉換成經緯度座標的功能
- 在表單上監聽表單送出事件:將觸發 geocode() 方法轉換地址
<template>
  <div class="container">
    <div class="row">
      <div class="card col s6 offset-s3">
        <form class="card-content" @submit.prevent="geocode">
          <h5 class="center">餐廳資訊</h5>
          <div class="row">
            <div class="input-field col s12">
              <label for="name">餐廳名稱</label>
              <input type="text" id="name" v-model="restaurant.name" />
            </div>
            <div class="input-field col s12">
              <label for="address">餐廳地址</label>
              <input type="text" id="address" v-model="restaurant.address" />
            </div>
            <!--顯示錯誤訊息-->
            <p v-if="errormsg" class="center red-text">{{errormsg}}</p>
            <div class="input-field col s12 center">
              <button type="submit" class="btn waves-light waves-effect">submit</button>
            </div>
          </div>
        </form>
      </div>
    </div>
  </div>
</template>

<script>
export default {
  data() {
    return {
      restaurant: {
        address: "",
        name: ""
      },
      errormsg: null,
    };
  }
  methods: {
    geocode() {
      // 處理表單送出後步驟
    }
  }
};
</script>
2. 將地址轉換為經緯度座標
- 建立一個 initGeocoder() 方法 — 透過 google.maps.Geocoder() 物件建構子建立一個geocoder 物件實例,並在元件 mounted() 階段就先呼叫,把 geocoder 物件實例先準備好。
- 當監聽到使用者送出表單事件時,再透過 geocode()方法,取得使用者輸入的地址,請 Google Maps API 轉換為座標經緯度
- 當轉換成功時,將第一筆結果的經緯度存取起來;失敗時則顯示錯誤原因
- 根據轉換結果,更改 hasGeo 狀態:true 為已成功獲得經緯度、false 則為未成功獲得經緯度
<script>
export default {
  data() {
    return {
      restaurant: {
        address: "",
        name: "",
        // 用來存放餐廳經緯度
        lat: "",
        lng: ""
      },
      errormsg: null,
      // 存放 geocoder 物件實例
      geocoder: null,
      // 存放目前是否已獲得座標的狀態
      hasGeo: false,
    };
  },
  mounted() {
    this.initGeocoder();
  },
  methods: {
    // 透過 google.maps.Geocoder() 物件建構子建立一個 geocoder 物件實例
    initGeocoder() {
      this.geocoder = new google.maps.Geocoder();
    },
    geocode() {
      // 取得餐廳地址
      const address = this.restaurant.address;
      this.geocoder.geocode(
        // GeocoderRequest 物件: 帶入要轉換的地址與相關設定
        {
          // 地址
          address: address,
          // 限制轉換的結果必須是在台灣的範圍
          componentRestrictions: {
            country: "TW"
          }
        },
        // 轉換完成後呼叫的 callback 函式
        (results, status) => {
          if (status === "OK") {
            // 當轉換成功時,將第一筆結果的經緯度存取起來
            this.restaurant.lat = results[0].geometry.location.lat();
            this.restaurant.lng = results[0].geometry.location.lng();
            // 更新狀態為已經獲得經緯度
            this.hasGeo = true;
          } else {
            // 更新狀態為未經獲得經緯度
            this.hasGeo = false;
            // 當轉換失敗時,顯示錯誤原因
            this.errormsg = status;
          }
        }
      );
    }
  }
};
</script>
❗️回傳內容
成功轉換時,回傳的內容可能包含一筆或多筆結果,如有多筆資料時,越符合的結果排序越前面,每筆結果中可能帶有以下資料,詳細回傳結果可以參考 ?官方文件:

1. formatted_address: 通常和郵件地址相同

2. place_id: 一個地點所對應的獨特 ID,可在其他 Google API服務中使用

3. geometry: 其中的 location 屬性帶有包含轉換後的經緯度結果的

4. partial_match: 一個布林值,代表地址可能有誤,因此在只能成功轉換部分的地址
3. 呈現經緯度座標
於 <template> 當中,表單下方設計一個區塊:在表單送出,且收到 Google Maps API 回傳經緯度座標後 — hasGeo 狀態為 true 時 — 將餐廳名稱和座標呈現在此區塊供業主確認:
<template>
  <div class="container">
    <div class="row">
      <div class="card col s6 offset-s3">
        <form class="card-content" @submit.prevent="geocode">
          <h5 class="center">餐廳資訊</h5>
          <div class="row">
            <div class="input-field col s12">
              <label for="name">餐廳名稱</label>
              <input type="text" id="name" v-model="restaurant.name" />
            </div>
            <div class="input-field col s12">
              <label for="address">餐廳地址</label>
              <input type="text" id="address" v-model="restaurant.address" />
            </div>
            <!--顯示錯誤訊息-->
            <p v-if="errormsg" class="center red-text">{{errormsg}}</p>
            <div class="input-field col s12 center">
              <button type="submit" class="btn waves-light waves-effect">submit</button>
            </div>
          </div>
        </form>
      </div>
      <!--當成功獲得經緯度時,顯示餐廳資訊及經緯度資訊-->
      <div class="card col s6 offset-s3" v-if="hasGeo">
        <div class="card-content">
          <h5 class="center">確認資訊</h5>
        </div>
        <div class="card-action">
          <p class="grey-text">餐廳名稱:{{restaurant.name}}</p>
          <p class="grey-text">餐廳緯度: {{restaurant.lat}}</p>
          <p class="grey-text">餐廳經度: {{restaurant.lng}}</p>
        </div>
      </div>
    </div>
  </div>
</template>
功能呈現
4. 將餐廳呈現在地圖上
一般人通常不會知道自己的店家的經緯度座標,因此若能將店家資訊呈現在地圖上,就能讓店家業主更方便確認位置的正確性:
引用已建立好的元件
由於在上一篇 Google Maps API 練習時已經實作過地圖、地標、訊息視窗,並且在文章最後將「地圖產生的功能」獨立成一個可被重複使用的元件,這邊就直接引用該元件來使用:
- 在 components 資料夾中建立一個 GMap.vue 檔案
- 前往? GitHub 專案資料夾 找到在上一篇已經製作好的元件
- 將程式碼複製到目前專案的 /components/GMap.vue 檔案中
根據坐標產生地圖
接著在 NewRestaurant.vue 檔案中的 :
- 引入 GMap 元件
- 在 components 屬性上註冊 GMap 元件
在 NewRestaurant.vue 檔案中的 :
- 呈現餐廳資訊的區塊擺放顯示地圖的 GMap 元件
- 將產生地圖、地標、訊息視窗所需的資料帶入 GMap 元件當中
<template>
  <div class="container">
    <div class="row">
      <div class="card col s6 offset-s3">
        <form class="card-content" @submit.prevent="geocode">
          <!--輸入餐廳資訊的表單...-->
        </form>
      </div>
      <div class="card col s6 offset-s3" v-if="hasGeo">
        <div class="card-content">
          <h5 class="center">確認資訊</h5>
        </div>
        <div class="card-action">
          <!--使用 GMap 元件,並將餐廳和設定資訊帶入-->
          <GMap
            :center="{lat: restaurant.lat, lng: restaurant.lng}"
            :restaurants="[restaurant]"
            :streetViewControl="false"
            :mapTypeControl="false"
            :fullscreenControl="true"
            :zoomControl="true"
          ></GMap>
        </div>
        <div class="card-action">
          <p class="grey-text">餐廳名稱:{{restaurant.name}}</p>
          <p class="grey-text">餐廳緯度: {{restaurant.lat}}</p>
          <p class="grey-text">餐廳經度: {{restaurant.lng}}</p>
        </div>
      </div>
    </div>
  </div>
</template>

<script>
// 引入 GMap 元件
import GMap from "../components/GMap";
export default {
  components: {
    GMap
  },
  data() {
    return {
      restaurant: {
        address: "",
        name: "",
        lat: 25.0325917,
        lng: 121.562499
      },
      hasGeo: false,
      errormsg: null,
      geocoder: null
    };
  },
  mounted() {
    this.initGeocoder();
  },
  methods: {
    initGeocoder() {
      this.geocoder = new google.maps.Geocoder();
    },
    geocode() {
      // 轉換地址為最標...
    }
  }
};
</script>

<style scoped>
/* 為地圖增加寬度和高度 */
.google-map {
  width: 100%;
  height: 300px;
}
</style>
功能呈現
結語
本篇因為是延續前一篇實作,因此直接使用 Maps JavaScript API 當中地址轉地標的 Geocoding Service 功能。若單純想透過地址轉換地標,並運用回傳的資料時,也可以直接使用 Geocoding web service 服務,在相同 $200 美金的額度下,可以載入的次數也比較多。
上一篇學習和實作了地圖、地標、訊息視窗,本篇的練習則專注在使用 Geocoding 的服務 — 模擬將餐廳業者所提供的地址轉換成地標,並將獲取的地標呈現在地圖上。非常期待接下來能將這兩次所學習和實作的功能運用在 Final Project 上!
專案資料夾
本篇完成的功能與程式碼將一併上傳至 GitHub 以供參考!
如果你喜歡他的文章,歡迎回到他的Medium【麥克的半路出家筆記】看更多。如果你想要知道更多關於Vue.js課程,快樂學程式也推出了實作專案在此:

如果你的入門還在單打獨鬥,歡迎來到快樂學程式找到志同道合的夥伴,你的自學之路不孤單。